
A workflow is the complete path a workflow item must take before it is completed. A workflow can contain one or more steps. Each step is an individual assignment that a contributor can work on.
Once you’ve finished setting up all the assignments in a new workflow, you'll be prompted to launch it. Launching your workflow makes your assignments available for contributors to work on.Review Your Workflow Data
Before you launch a workflow, you're given the opportunity to review your inputs and outputs. Make sure your workflow data is formatted correctly, as you can’t make changes to these fields once you’ve launched your workflow.
REVIEW WORKFLOW DATA: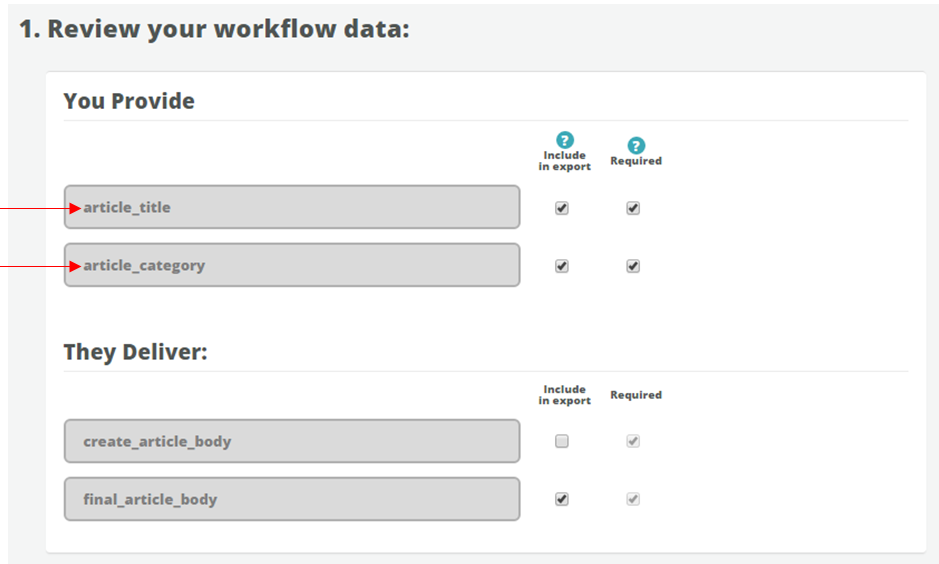
Upload a Batch of Items
In order to launch a workflow, you’ll first need to upload a batch of workflow items. This batch contains your inputs, or the information you provide contributors in order for them to complete the work items.
Use Microsoft Excel or Microsoft Numbers to format and save your batch. The first row should contain the names of all required inputs for this workflow. The input names must be formatted the same as they are on this page in order for your batch to import successfully.FORMAT YOUR BATCH: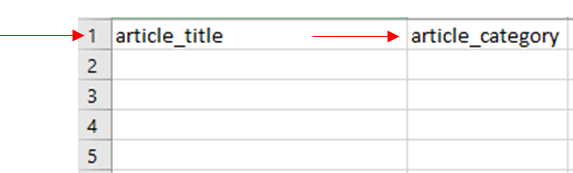
ADD YOUR INPUT VALUES FOR EACH ITEM: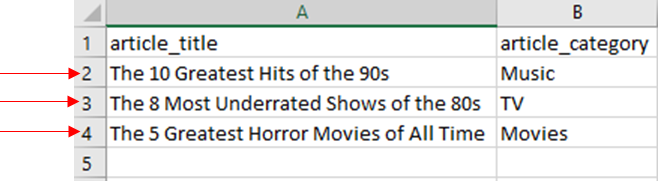
Each batch should have a distinct file name. This makes it easier to refer to and track the progress of individual batches.
We recommend using the following naming convention:
[Date] - [Batch #] - [Workflow Name]
EXAMPLE:
5.24.16 - Batch 1 - Finance Articles
SAVE YOUR CSV: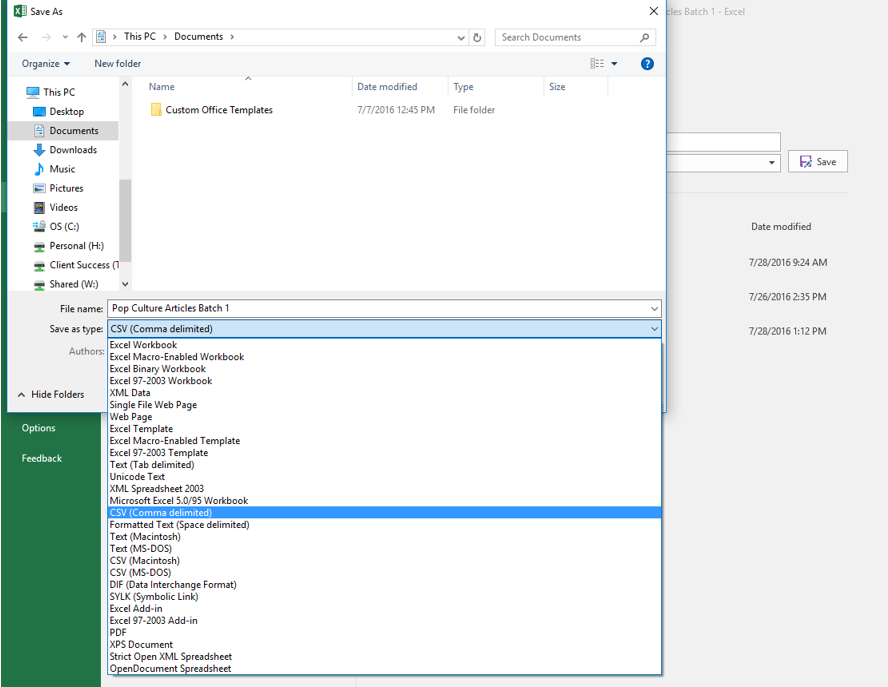
When you successfully upload a batch, you’ll see a summary of:
- Your current account balance
- Estimated cost per workflow item
- Estimated total cost for batch
The cost per item and cost per batch are an estimate, because certain factors, such as rework settings or rejecting work, can impact average cost.

Preview Assignments
Before you launch your workflow, make sure you preview each step, or assignment, in the workflow. When you preview an assignment, you view it exactly as your contributors see it when they work on a task.
You won’t be able to make changes to the task interface once you've released your first batch, so make sure everything is configured properly before you continue to the next step.PREVIEW THE STEPS IN YOUR WORKFLOW: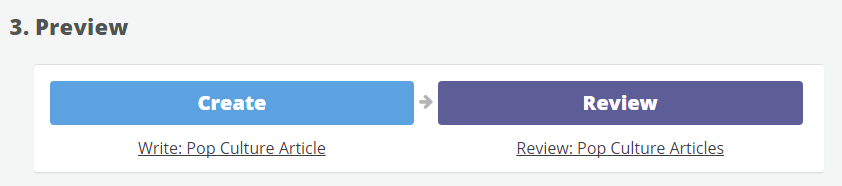
Launch
Once you've previewed your assignments and made any necessary changes, you can then choose how many of your staged workflow items you want to release, or make available, to your contributors.
Whenever you're launching a brand new workflow, we recommend that you first release only one or two items in the batch. This lets you review the live assignments to make sure everything is working correctly before you release the entire batch.The total estimated cost of the items you release is held by OneSpace to cover the cost of completing the items. After you enter the number you want to release, you'll see your remaining account balance after this cost is deducted.
If you have enough funds to cover these items, click Launch to launch your workflow and make your assignments available to contributors.
If you don't have enough funds to cover the number of items you want to release, you can click Add Funds to contact us about adding more funds to your account.
LAUNCH YOUR WORKFLOW: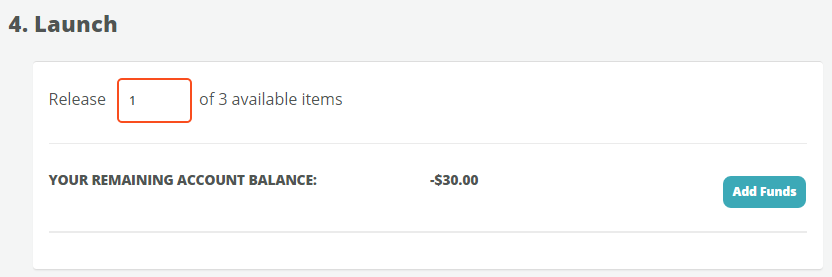
Monitor
After you launch your workflow, you can use the Workflow Monitoring page to track important metrics like cost, velocity and quality.